Understanding Your Hot Water System and Its Components
The water heater is an essential appliance, accounting for roughly 25% of a home’s energy consumption. The key components that allow a hot water system to heat and deliver water effectively are:
- Storage tank - Retains heated water for immediate use
- Heat source - Generates heat for water using gas, electricity, or solar energy
- Thermostat - Regulates water temperature by controlling the heat source
- Sacrificial anode - A metal rod that corrodes to prevent tank corrosion
- Relief valve - Releases excess pressure, safeguarding against overpressure
- Pipes and fittings - Conducts hot water to taps and showers
- Drain valve - Drains and flushes the tank for maintenance
These components work together to provide a reliable supply of hot water safely. Comprehending their operation is essential for troubleshooting and maintaining system efficiency through procedures like tank flushing and anode rod inspections. Regular servicing by a professional is recommended to maximise the system’s durability.
Locating and Inspecting the Drain Valve
The hot water system’s drain valve is generally found at the tank’s base. It looks like a regular hose bib or spigot. The main purpose of the drain valve is to flush and drain the water heater for maintenance.
To assess the drain valve, follow these steps:
- Locate the valve near the base of the hot water heater.
- Check for corrosion or mineral deposits around the valve opening.
- Connect a garden hose and momentarily open the valve to assess the water flow.
- Examine for evidence of leaking at the connections.
- Close the valve firmly when done.
A well-functioning drain valve ensures a smooth water flow. Issues such as blocked drainage, dripping valves, or reduced flow may signal the need for repairs.
Regularly flushing the tank via the drain valve can prevent sediment accumulation, thus extending the life of the hot water system. If you notice problems, try opening and closing the valve several times to clear minor blockages. Otherwise, contact a professional for service.
Common Drain Valve Issues
Signs of a leak include:
- Water pooling around the valve or pipes
- Visible dripping or moisture
- An overflowing drain pan if present
Potential causes could be a loose valve connection, broken seal/gasket, or corrosion damage. Try tightening the valve by hand first. Consistent leaks typically necessitate professional valve replacement.
Drain valve corrosion is visible as mineral deposits, rust stains, peeling paint or a green tinge. It can be caused by:
- Sediment buildup
- Chemical water composition
- Old age
To maintain functionality, it’s important to replace any corroded valves. Flushing the tank and inspecting pipes regularly can also help to prevent additional corrosion.
Leakage
Water leaks are a common issue with hot water system drain valves. Common sites for leaks to occur are:
- The valve connection point
- Pipe joints
- Tank fittings like the relief valve or anode rod
Persistent dripping or pooling water indicates worn gaskets/seals. It can also signal corrosion and mineral buildup damaging components. It is crucial to deal with leaks as soon as they are discovered.
Initially, try hand-tightening the fittings to see if it stops the leak. Containing water and drying the area is also advised to prevent further damage.
If self-fixes don’t work, contact a professional plumber immediately. A leak left unchecked can lead to flooding, mould risks, and even tank failure over time due to corrosion and excessive pressure.
Corrosion
Corrosion is a common issue affecting hot water system components like the drain valve. It occurs when metal parts react with oxygen or minerals in the water. Signs of corrosion include:
- Rust coloured stains
- Pitting or holes forming in the valve or pipes
- Flakes or green residue around fittings
Over time, corroded drain valves may start to leak and fail to function correctly. Replacement is needed to ensure it’s working properly in such cases. Preventing corrosion through regular tank flushing and anode rod checks can prolong system lifespan.
Using plastic piping also limits corrosion chances in electric gas water infrastructure compared to copper. And installing an electronic water descaler provides corrosion protection too. Contact a plumber if you suspect valve or pipe corrosion to prevent further damage.
Troubleshooting Drain Valve Problems
Drain valve issues can arise over time due to sediment buildup, wear and tear, or improper use. Here are some troubleshooting tips:
Checking for Leaks
Check your valves and pipe connections for dripping or pools of water. Tighten fittings by hand or with a wrench to stop minor leaks. Significant leaks often necessitate professional valve replacement.
Clearing Blocked Drainage
Use a wire brush to scrub mineral deposits clogging valve openings. Open and close the valve repeatedly to flush out debris. A plumber can fully clear extensive sediment buildup.
Replacing Corroded Valves
Look for rust stains or green residue indicating corrosion damage. The valve likely needs professional replacement if it is too difficult to open or close.
Regulating Water Pressure
If there is still an issue after these checks, improper water pressure may be contributing to valve leaks. Consult our water pressure troubleshooting guide or contact a plumber if pressure issues persist.
Catching drain valve problems early makes them easier to fix. Contact our team if DIY troubleshooting does not resolve the issues.
Checking Power Supply
Verifying that your gas water heater has power is an important troubleshooting step.
- The power cord is firmly plugged into the wall outlet
- Any circuit breakers connected to the system are in the 'on’ position and functioning properly
- The wall outlet itself has power
For electric hot water systems, ensure that:
- The manual gas valve near the unit is in the 'on’ position
- There are no interruptions to your general gas supply
Loss of power can result in no hot water, completely disrupting hot water production. It pays to trace supply issues early because restoring operation is typically simple once power is back online.
If there are still no signs of power after checking breakers and supply sources, contact our service team for professional assessments.
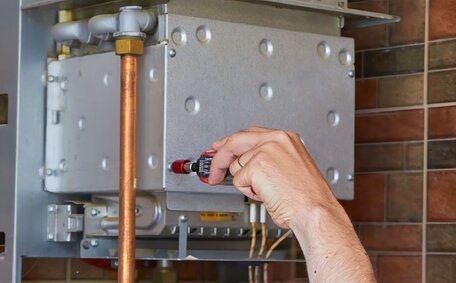
Inspecting Pilot Light and Thermocouple
The pilot light and thermocouple are critical components in a gas hot water system. The pilot light ignites the main burner to heat water but also requires attention when the light goes out. The thermocouple generates a small electric current to hold the gas valve open while lit.
To inspect these parts:
- Locate the pilot light assembly on the base of your hot water tank.
- Check that the pilot light lit remains steady and burning. If not, refer to relighting instructions below.
- Verify the thermocouple tip inside the pilot flame shows signs of warmth.
- Ensure wiring connecting the thermocouple and gas control valve is intact.
If the pilot light goes out repeatedly, thermocouple damage or malfunction may be preventing it from properly holding the gas valve open. Replacement by a professional will likely be needed in that case.
Relighting the Pilot Light
Shut off gas supply before attempting to relight the pilot. After waiting 5 minutes for gas to clear, follow relighting steps in the owner’s manual. If issues persist, call a plumber immediately.
Adjusting Thermostat Settings
The thermostat controls the temperature of the water in your hot water system. Adjusting the thermostat correctly can resolve many hot water issues.
Checking Current Temperature Setting
Start by checking your current dial or digital readout temperature on the thermostat:
- For gas systems, an ideal operating temperature range is 49-60°C
- Electric systems should be set to approximately 75°C
If set too high on gas water heaters, overheating and excess energy use can occur. Too low causes insufficient hot water supply and can lead to an uncomfortable cold water flow.
Changing the Temperature Setting
To adjust, turn the thermostat dial or use buttons to slightly increase or decrease as needed. Wait 1 hour, then check if your hot water working supply and flow meets your usage.
Minor gradual adjustments are recommended. Contact a plumber immediately if problems persist outside the ideal temperature range.
Properly setting your hot water system’s thermostat ensures efficient operation and can resolve many output issues without requiring part replacements.
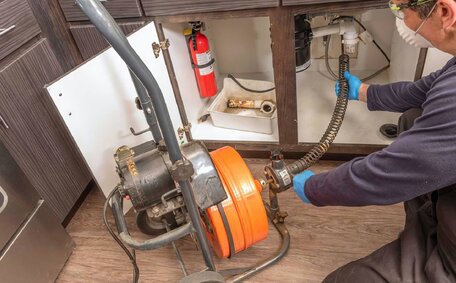
Flushing Sediment from Tank
Over time sediment can accumulate at the bottom of your hot water system’s tank. Flushing helps remove this buildup through the drain valve.
When to Flush
Flushing every 6-12 months removes mineral deposits before they reach problematic levels. More frequent flushing may be needed with hard water. Signs indicating sediment buildup include:
- Reduced hot water flow
- Rumbling or popping noises
- Yellow/brown water at taps
Flushing Procedure
- Disconnect the power supply to your hot water heater before draining.
- Connect a garden hose to the drain valve, leading it to a suitable drainage area.
- Activate the relief valve, cease water flow to the tank, then open the drain valve.
- Let water flowing out until it runs clean. This can take 10+ minutes.
- Close drain valve first, then relief valve.
For heavy sediment, repeating the process may help clear more buildup. Remember to refill the tank before restoring power.
Regular drain flushing extends your hot water system’s lifespan by limiting corrosion and insulating sediment. Contact our team if sediment problems persist after flushing.
Repairing Versus Replacing the Drain Valve
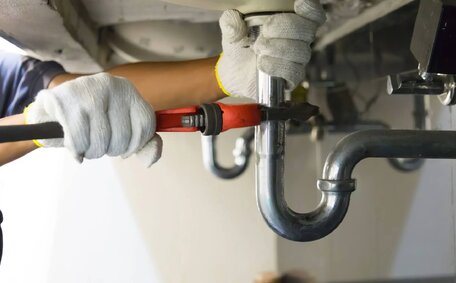
When drain valve issues arise, you first want to attempt repairs before resorting to full replacement. Simple fixes like tightening fittings, replacing seals, or clearing obstructions can often resolve problems.
When to Repair
Try repairing the valve if you notice:
- A minor leak from loose fittings
- Difficulty opening the valve due to sediment deposits
- Dripping seals that need replacement
Use thread tape and pipe wrenches to tighten fittings. Scrub away mineral buildup around the valve opening. Or replace worn gasket seals if leaking persists.
When to Replace
Valve replacement is needed if you see:
- Extensive corrosion and deterioration
- Major leaking that persists after attempted repairs
- An inability to open or close the valve at all
A valve that stops working properly due to age or sediment damage requires replacement. Seek professional help as major leaks can cause water damage if left unaddressed.
Attempting drainage repairs first often saves money over full replacements. But knowing when valve problems pass the point of DIY fixes is important too.
Seeking Professional Help
If DIY efforts to resolve your drain valve problems fail or the issues become complex, it’s time to call a qualified plumber. Signs that expert assistance may be required include major leaks even after tightening fittings, an inability to open/close the valve, suspicious electrical problems, or error code displays.
Our licenced Dulwich Hill Plumbing technicians have extensive experience servicing all makes and models of hot water systems. We can accurately diagnose issues and offer valve repairs or full replacements as needed. Upfront pricing means no surprise charges.
To book an appointment for drain valve troubleshooting and repairs, call 1300 349 338 or email [email protected]. Emergency plumbing requests are welcome 24/7. Investing in professional maintenance now can prevent severe damage and costly replacements down the road.
Importance of Preventative Maintenance
Performing regular preventative maintenance is vital for ensuring your hot water system, including components like the drain valve, continue working effectively long-term.
A maintenance checklist should include:
- Inspecting water heater pipes and fittings yearly for leaks or corrosion
- Checking valve seals biannually and replacing if worn
- Draining sediment/mineral deposits by flushing the tank every 6-12 months
- Replacing the anode rod every 3-5 years to prevent tank corrosion
Keeping records of service dates aids future troubleshooting. Over time, parts like the heating element and thermostats may need replacement to maintain functionality.
Investing in preventative hot water system maintenance reduces the chances of sudden drain valve failure. It also maximises the system’s lifespan, saving on costly replacements or emergency callouts down the track.
Contact our team about maintenance service options tailored to your hot water system’s make and model.